Designing my own keyboard from scratch - Part 1: Planning


This is not clickbait - this keyboard will be 100%, completely from scratch* that's my own original design. I will not use any existing parts already available. I'll be creating my own circuit schematic, designing my own PCB, designing my own case/enclosure, and have everything manufactured. Why? Let me tell you.
* Sorry, this part is clickbait. I'll be buying pre-made switches and stabilisers, because it's unnecessary and tedious to design these parts they're universal to every keyboard build (so there's no need to design them), and they're far more superior to anything that I'd ever design.
This is the first part of a five-part series that will cover the entire process from start to finish.
- Part 1 - Planning (this part)
- Part 2 - Schematics
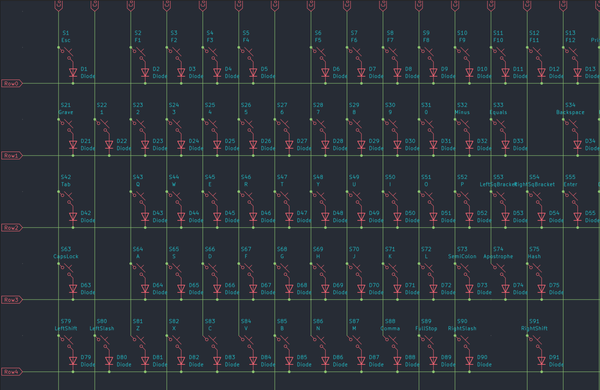
- Part 3 - The PCB itself
- Part 4 - The keyboard case and CAD
- Part 5 - Putting everything together
So, why am I doing this?
There is a vast community of people who build their own mechanical keyboards and customise them to their heart's content. The most common variations are people choosing different layouts, different keyswitches for the typing feel, and different keycaps and cases to express their personality. The short answer is that the parts I wanted don't exist, so I'm forced to make my own.
For the long answer, the parts I need to make a Tenkeyless (TKL) or full-size (100%) keyboard just aren't available in the custom community as there isn't enough demand. If you want to buy a keyboard off the shelf today, pretty much all of them are 100% size keyboards - it's the default keyboard everyone knows. As these sizes are so readily available, the custom keyboard community caters to sizes and configurations you can't get off the shelf - 40%, 60%, 75%, etc. This part is a rabbit hole in of itself, so I won't go into too much detail. However, because people are so focused on customising the sizes you can't get, there isn't a market for custom keyboards that are 100% or TKL, what I'm after; why make a custom keyboard of something you can get off the shelf?
Therefore, I'm in this reverse Venn diagram of not being able to create a custom keyboard that I want with readily available parts, as I want a full-size keyboard that I can customise. I find 60% and 75% annoying because I don't want to constantly use F-Keys to get the functionality I could get by pressing a button on a full-size keyboard.
So why design your own stuff?
Normally, when people build custom keyboards, they buy a PCB, a case, some switches, and some stabilisers and put it all together. If you want, say, a 60% side keyboard, you buy a 60% size PCB that simply needs your switches and stabilisers, put it into a case that perfectly fits, and you're good to go. Once I realised I couldn't get the size PCB and case I needed, I knew I needed custom parts.
And also, it's fun and it's a challenge! I'm into stuff like this, so working on designing PCBs, soldering it together, and designing a case in CAD is cool to me. Not to mention, there is something deeply satisfying about something you created being brought to life that previously only existed in your mind. You made something, and it works - it's all you.
The PCB and the case are two separate problems and require their own set of skills to design. To design a PCB, you need to understand electronics theory, be able to read and interpret datasheets for the parts you'll use, and put it all together; it's all very theoretical. To design a case, you simply need to be comfortable with a 3D CAD program of your choice - SolidWorks, AutoCAD, CATIA, Siemens NX, etc. It's technically challenging, but all you need to know is how to design something.
You can argue which one is harder, and both have their challenges, but ultimately, both skills are necessary to fully design a keyboard from scratch. Designing a case in CAD means knowing how to design a shape exactly as you want it, making sure parts clear and are within tolerance, and making sure it's aesthetically pleasing. But assuming you know the dimensions of the PCB and parts, you'll be able to visually see if everything fits or not. Designing a PCB, on the other hand, isn't inherently obvious at face value if you've made something that works or is just an expensive paperweight (more on this in Part 3 of PCB design).
I then realised I'd need to design a PCB, though my hope was to recreate a standard-size keyboard so that it fit an already existing case so that I wouldn't have to design one in CAD, because I don't know CAD. In a previous life, I studied Mechanical Engineering and I learned SolidWorks at university, but I didn't get to use it that much then and I've never touched it since, so I've completely forgotten what little CAD skills I had - all I remember is that I found it challenging. But I cast that problem to the side for now.
How did I even dare think I could design my PCB? Originally, I thought I'd have to learn a crap-ton of theory that bordered on university-level Engineering. However, one video I stumbled upon on YouTube showed me this was not the case. Specifically, this video from ScottoKeebs on designing your own keyboard PCBs sent me down the rabbit hole, but more on that in Part 2.
What features do I want my keyboard to have?
So this all started because I wanted a full-size keyboard, which I'd have to design myself. I figured if I was going through the effort of designing something from scratch, I may as well include other features I'd like that I know don't exist in other products.
What I want my keyboard to have is:
- A full-size ISO layout keyboard with a detachable number pad (So effectively TKL + Numpad)
- The detachable number pad can function independently**
- The keyboard connects via USB-C at both ends
- Media Keys
- A rotary encoder (think: volume knob)
- USB daughterboard**
- (Full RGB) backlighting**
- Built-in OLED screen for information and animations**
- Boot selector switch**
** These features were technically not part of the very first iterations, but something I wanted after I developed the first prototype
Let's break down what each of these features mean:
- An ISO layout is used for UK and other European keyboards, while ANSI keyboards are commonly used for US and other International layouts. The main difference is the size and shape of the Enter key, the Space bar, and a few other bigger keys. One is not objectively better than the other, it's purely whatever keyboard layout you want to use. I live in the UK, and I've used ISO layouts all of my life, so I prefer ISO layouts as they're what I'm used to. I onced owned an ANSI keyboard in a US layout, which was my very first ever mechanical keyboard, but I missed the UK layout. When you come to buy your own custom keycaps, ANSI keycaps are more common, but most keycap sets include or give you the option to buy additional ISO-specific keycaps, so that you have the full range, regardless of your layout.
- I originally wanted a TKL keyboard, but I do sometimes genuinely use the number pad. Some video games make use of it, sometimes it's a nice-to-have for data entry. But when I'm not using it, being able to detach it would be nice to keep the keyboard sleek. Not to mention, it's a nice flex by having something custom like that.
- Exactly as it suggests. I want my keyboard to connect to my PC via USB-C, but I also want the cable to detach from the other end my keyboard using USB-C. It means I can swap out and customise the cable that is fully reversible and not proprietary.
- I often use media keys to pause/play songs, go back songs or skip to the next one as I frequently listen to Spotify or watch YouTube videos. I don't want the bother of having custom-shaped buttons, so I'll design my keyboard to have the same mechanical keyswitches as my media keys. Besides, it'll feel nice.
- A volume knob, to turn the volume up/down or to mute completely. A rotary encoder is the name of the component that lets you do this and is commonly referenced in the custom keyboard community. Some rotary encoders have built-in switches, so you can use it as a Mute button as well.
- A daughterboard is a separate PCB that connects to the main PCB. You have the choice to solder the USB connector directly onto the main PCB, but a daughterboard is a better approach in my opinion - more on this in Part 3.
- This can be only single-colour LED backlighting; it doesn't have to be rainbow puke, which I don't care for. but I figured that if I'm going through the effort of developing LED backlighting, I might as well make it fully RGB to have the choice.
- The OLED screen will be single-colour - it won't be full colour. It'll display information like if my Caps Lock, Num Lock, or Scroll Lock is on. Additionally, the firmware you develop for your keyboard allows you to add other information like WPM (word per minute) counters or animations. It's a nice touch.
- This is a switch that allows you to toggle your keyboard's microcontroller so that it can toggle between appearing as a keyboard or as a USB device. This is an essential functionality built into all microcontrollers that is required to use at least once so that you can upload your keyboard's firmware. While a switch isn't required, it's a nice quality-of-life feature for developing and troubleshooting your keyboard, as most microcontrollers don't have those switches by default and require you to short one of the pins in some way to toggle that functionality.
Now that we know what we want and what we need, let's get to work on designing it. At the time of publishing this post, I had already gone through two iterations of design (v1.0 and v1.1) and ordered PCBs for v1.1. Going forward, I'll cover off v2.0 onwards and what I learned from v1.0 and v1.1.